You know? I can put soil/dirt/compost into a raised bed and over the winter many little rocks appear. I don't know if one rock finds the bed and invites all its friends over or if the winter rains and snows wash the soil away and expose the rocks or if I just had lousy dirt to begin with. I do know I'm sick of picking rocks out and throwing them across the road into the woods. For one thing I never look before I throw and there are occasionally cars passing by on their way to discover what "Not a through way" means.
Anyhow, it seemed to me in my new found confidence from making the two new garden beds and actually repairing in situ one of the other ones, that making a little box screening thingie to get rid of some of those rocks should be doable.
For my more carpenter inclined readers I apologize for not being more expert but here goes (went).
Off to Home Depot for materials: 2 x 4 lumber, exterior corner braces and some 1/2 inch hardware cloth. BTW,for the uninitiated, be advised that "hardware cloth" is wire mesh with an affinity for human flesh only exceeded by that of chicken wire. It is handled at your peril!
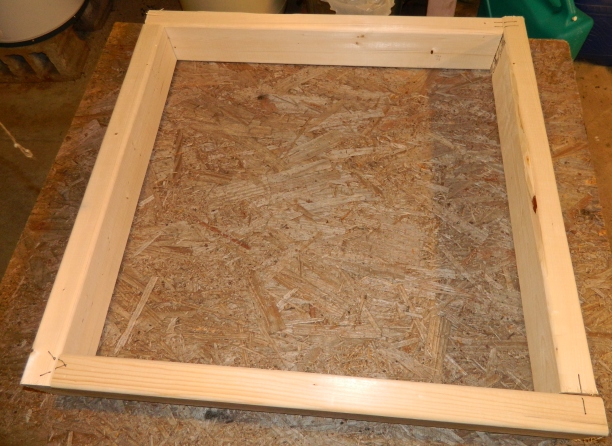
I'm getting a bit smarter as I go along so I laid out the pieces of lumber that the nice man cut down for me before I started actually connecting them. Good thing - when measured I had 2 pieces at 24 inches and 2 other ones at 23-1/2 inches. Connecting in the wrong order would have been even further from a square than my usual results.
 |
Even got smart and marked which ones went together
|
Gathered up the tools I'd need.
 |
| Tin snips - not optional! |
 |
| Drill & bits, pencil, corners, wood & wire |
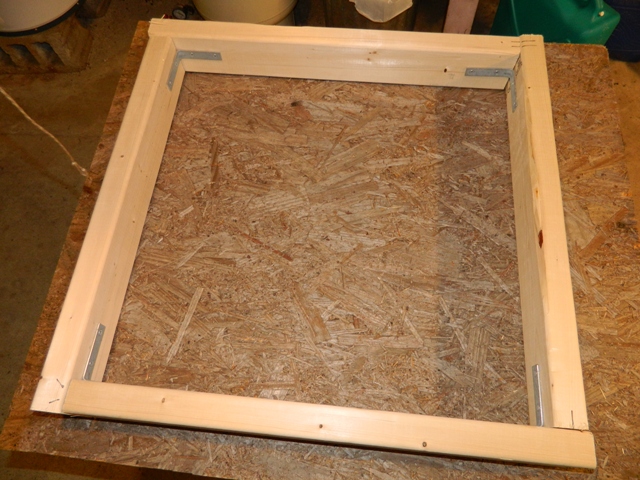
Next on the discovery list was that the corner braces were interior, not exterior as I'd asked for - note to self: look at stuff before you assume it's correct.
 |
| Interior corner braces |
 |
| Frame assembled |
Now to add the hardware cloth to the top of the frame and secure it in place without blood loss (mine) or escape (the wire). It comes in a tightly wound roll and is pretty resistant to unwinding and lying peacefully in place. Ok, it's damn near impossible but if you are persistent it can be done. One trick is to secure one side/end so it is square to the frame before you nail/staple it down. I actually managed it pretty well (still no blood loss or escape) and then just needed to staple it all around before I cut the excess off. Believe me that is where the tin snips come into their own - this is not stuff to try to conquer with side cut pliers - been there/done that/bled quite a bit.
 |
| All ready to staple down and cut off excess |
Got it all done! Until I try it no telling how well it's going to function out in the real world but fortunately it's raining today so I can hang out inside and bask in optimism - which may or may not be justified!
Below is the top and bottom of the end result. Am I annoyed that some of the joints aren't quite square or as tight as I'd like? You bet - does it matter in the long run? Probably not.
 |
| Top |
 |
| Interior |
There is something so cool about being able to make something useful and have it come out almost like the picture I had in my mind. The rain finally stopped so I took it for a test drive.
 |
| Sifter at work |
 |
Results - no rocks!
|
I think I need legs/braces on one end to maintain a slant but haven't figured out how exactly to do it yet. But right now I'm thinking it's a plan that worked and I got it done!


Someone once told me that rocks/stones actually push to the top of soil...that's why some folks say they can only grow stone. LOL There has to be a scientific explanation, but at 10:30 at nite I don't want to think that hard!! I am very proud of your handiwork. :)
ReplyDelete